For some reason I forgot to photograph my sock during my travels! I made serious headway on the flight home through sets of cables. And now here at home, I'm making my approach to the heel flap.
Last one to make was the kitchen window! I was not crazy about the colour of my linen fabric against the wall colour, Sesame (Benjamin Moore). What to do now? I perused some beautiful, rather expensive fabrics in the stores, but then considered the use of that covering. I knew it would mostly be up, I was really just wanting that window to look finished, and to add some fabric to the room. (I could have made just a window topper/valance, but if I made a roman shade I would at least have the option to lower it.) So with function and economy in mind, off I went to IKEA and found a very reasonably priced "linen look" curtain in white - it looked smashing beside the Sesame! I cut up one panel to the dimensions I needed, then went to Smoking Lily for the third design. Apple blossoms is one of their newer prints - I thought it would look fresh and have kitchen appeal. I chose two variations of that print, the more solid one in white, the other more outlined print in raspberry. The result is exactly as I thought it would be, and it works beautifully in the room adding crispness and softness!
Unfortunately I did not photograph the prints before the blinds were hung, so now it's difficult to get a good image without the flash or backlight hampering the photo. This one (below) of the blind down shows the vertical seam of the sheer cotton lining. I am not fussed by this at all since I don't expect the blind to be down during the day.
For each blind, I used white 1.4 mm cord, flat pulleys, and a strong plastic cleat around which to wrap the cord.
I used painted white metal cord drops which house the knot ends of the cords. Each blind has a weight rod (steel or aluminum, depending on the width of the blind) in the bottom, and plastic battens (the horizontal rods which ensure proper up and down folds). All of the supplies I just mentioned were from Terrell Designs. I had the wood mounting boards cut for me at local lumber yards.
Making these roman shades was an enjoyable and very satisfying learning experience for me. There are more in my future! Next up will be the dining room window, hopefully later this year. In the meantime....back to knitting!
I had lots more fabric to use, so onto the family room! There is a print design that I have been coveting for some time now at Smoking Lily, it's the henna medallion. Without a doubt in my mind, I chose it to star on this shade. I am so happy with my choice! (the photo itself is not my best work, sorry about that)
As an aside, I am loving the grey paint colour on the walls, the henna print looks so good with it! So far we are two for two!
I love the trims on all the windows in the house and want to admire them, so roman shades seemed like a good choice of window covering since they can fit within the frame to leave the trim exposed. Not to mention, they don't use much more fabric than the actual area of the window itself. I can do this!
I searched around on the internet and found excellent instructions here. This site was my resource from beginning to end. I worked on the bedroom windows first since they are small, and would be a good starting point.
While I love the naturalness of the linen, I thought I could have a little fun with something printed on it. As you may guess, I called on my friends at Smoking Lily! I love choosing designs with the help of Glenda and Erin at the Main Street shop, we always have lots of fun in the process and I leave inspired, every time.
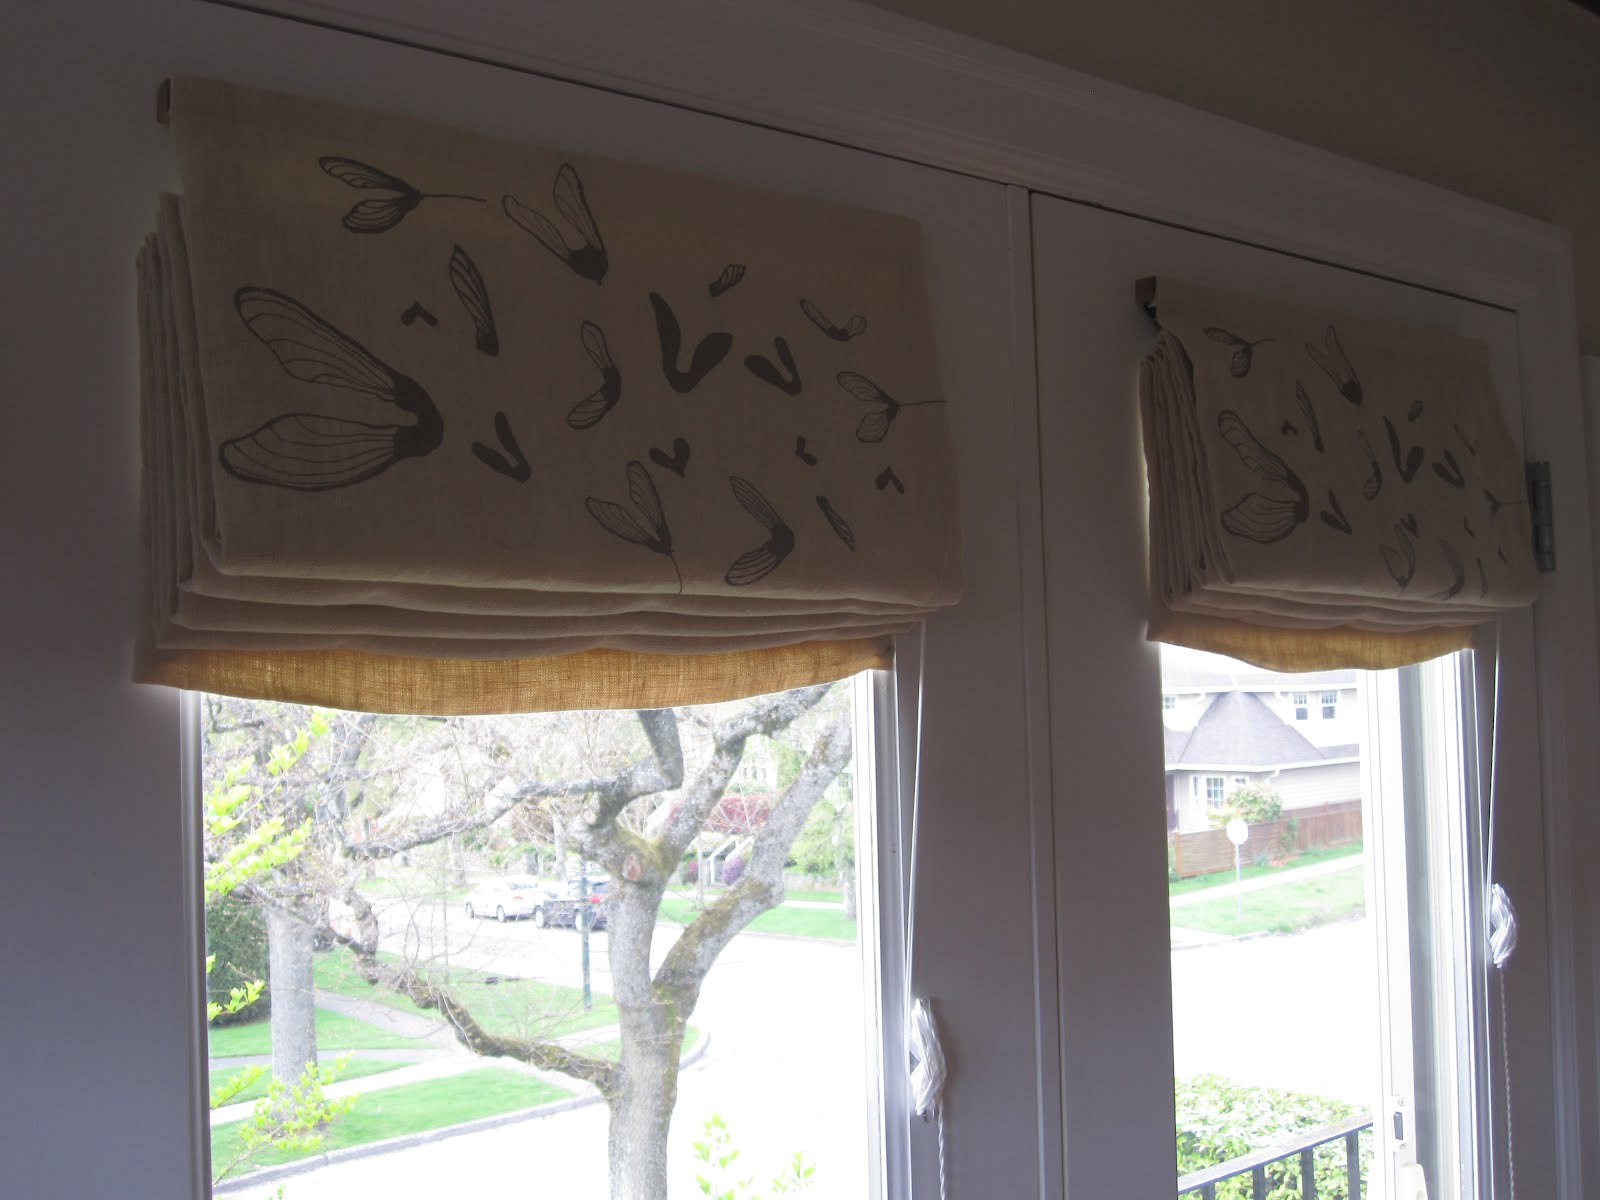
This time was no exception, here you see the ever-popular gender neutral maple pods making their appearance on the bedroom shades! We live on a tree lined street and have a couple of maples in our yard, so I thought this was rather befitting.
Since the blinds would mostly be "up," I thought it would be economical to print only the top part that would always show. I think they turned out great and could not be more pleased with them, I love them! (and so does he).
I've been working on this project for a few months, but I am finally ready to share it!
One day I was thinking about my bedroom windows. When we renovated our home in 2004 and put in the French doors and outer windows, I had had custom full length curtains sewn for them, made of a lovely crinkly linen/hemp fabric complete with dim-out lining. I liked them...mostly for the fabric, not so much for the style.
Then over the last two years I contemplated my family room and kitchen windows. The family room (below) had a venetian blind which was okay (you can see it here pulled up), but I was ready for a change. It was only meant to be temporary anyway (from our move here in 1999).
Also, I felt our recently renovated kitchen (2009) was in need of some soft texture, and the window had nothing on it.
I got to thinking about all the fabric and lining used for the bedroom curtains, and thought to myself, "Why don't I just cut them up and make roman blinds for the other windows?" I tossed the idea out to Kirk who is very amenable to my creative pursuits, he merely shrugged and likely wondered why I was even asking him. So I went for it!
I set to taking them down, then machine washed and hung to dry. I was excited about my new project!
One of my key favourite ways to re-charge my batteries!
I made these over the winter. In order, they are Scylla, then two pairs of plain vanilla socks with details here and here.